Securing (HTTPS) a single-node Elastic Beanstalk server
Creating certificates with certbot is super easy. A few configuration files, and your website can be running HTTPS certificates.
AWS has great resources for working with certificates in a load balanced environment. Unfortunately, it's not so easy if you have a single node. It's still not crazy hard, but it takes a bit of configuring. So let's do it.
If you want, you can follow along with the video, or walk through the steps below.
Why?
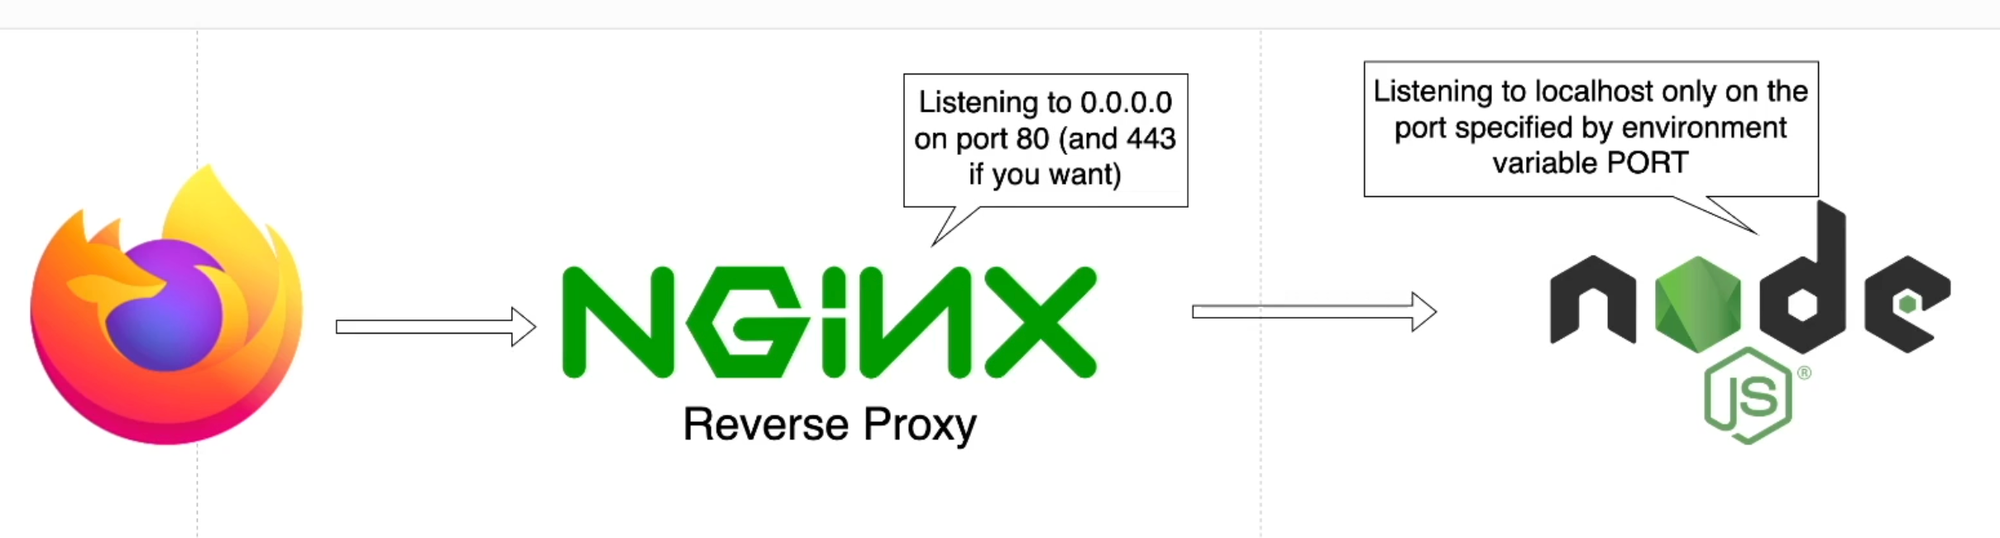
In a single-instance environment, Elastic Beanstalk sets up your website with Nginx (by default) as a reverse proxy. This means that when requests come to the server, they first come to Nginx. Nginx then passes the request to the NodeJS server (or Python, or whatever language you're running) that is running on the server.
To set up our certificate, we need to tell Nginx to request the certificate. Let's Encrypt provides free SSL certificates, and the certbot tool automatically requests those for you.
In an EC2 environment (without Elastic Beanstalk), you would log into the server and tell it to install certbot, then have certbot run to install the certificate. In Beanstalk, though, things work a bit different. Every time you deploy a new version of your site, AWS creates a new server to run that code. Once it's up and running, the old server is deleted. So logging into the server directly to make changes won't work, because those changes will get wiped out every time you update your website.
So instead of logging in and making changes directly, we write scripts that will be run for us. This is a great example of Infrastructure as Code (IaC). We make our setup more repeatable by removing manual configuration steps and instead automating our deployments as much as possible. This helps to document the deployment process, makes our deployments repeatable, and reduces the burden of updating our applications.
Step 0: Have a working website
First you have to have a working website on Elastic Beanstalk. If your website doesn't work before you try to set up HTTPS, it's not going to work after, either. Follow my tutorial to get your website deployed.
Step 1: Create the DNS record you want to use
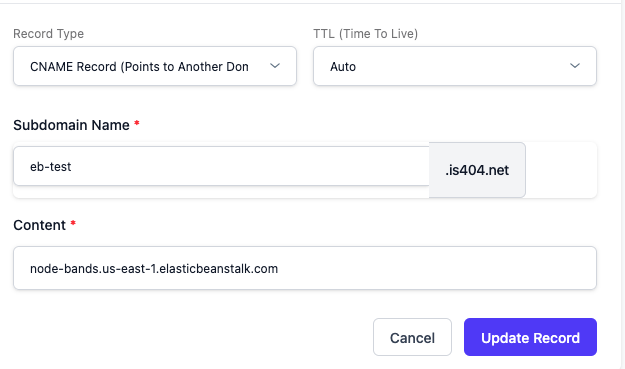
Elastic Beanstalk provides you with a domain name (something like domain.us-east-1.elasticbeanstalk.com) for your application. That's fine, but you can create your own DNS records that point to your application instead using any domain you can control.
To use a custom domain, create a CNAME record that points to your service's domain.
Step 2: Tell Elastic Beanstalk how to install and use certbot
To have Elastic Beanstalk install certbot when it creates an instance, you can create some special files that run when your instance is being created, or once it is deployed. These go in very specific locations, so make sure you're putting them in the right place.
First, create a folder in the base of your project called .ebextensions. This folder contains configuration files that are run when your instance is created (and therefore every time you update your code). Inside that folder we're going to create two files:
00_install_certbot.config will run through the steps to install certbot.
# .ebextensions/00_install_certbot.config
container_commands:
  00_install_deps:
    command: "sudo dnf install python3 augeas-libs"
    ignoreErrors: true
  10_create_venv:
    command: "sudo python3 -m venv /opt/certbot"
    ignoreErrors: true
  20_update_pip:
    command: "sudo /opt/certbot/bin/pip install --upgrade pip"
    ignoreErrors: true
  30_install_certbot:
    command: "sudo /opt/certbot/bin/pip install certbot certbot-nginx"
    ignoreErrors: true
  40_link_certbot:
    command: "sudo ln -s /opt/certbot/bin/certbot /usr/bin/certbot"
    ignoreErrors: true
10_open_https_port.config will change your Security Group (firewall) configuration to allow TCP port 443 for HTTPS traffic
# .ebextensions/10_open_https_port.config
Resources:
  sslSecurityGroupIngress:
    Type: AWS::EC2::SecurityGroupIngress
    Properties:
      GroupId: {"Fn::GetAtt" : ["AWSEBSecurityGroup", "GroupId"]}
      IpProtocol: tcp
      ToPort: 443
      FromPort: 443
      CidrIp: 0.0.0.0/0
These files are run in numerical order, with install_certbot running first, then open_https_port. In this case the order doesn't matter that much, but sometimes you need to be sure about the order things run in, and the numbers help ensure that order is followed.
Next, we need to create a nested directory in the project root. This directory is .platform/hooks/postdeploy . As you might suspect, this folder contains files to be run after your project is successfully deployed. In that folder, create a file called 00_get_certificate.sh:
#!/usr/bin/env bash
# .platform/hooks/postdeploy/00_get_certificate.sh
sudo certbot -n -d YOURDOMAIN --nginx --agree-tos --email YOUREMAIL
This script runs certbot after your instance is deployed, and requests a certificate for YOURDOMAIN. Replace this with your own domain, and replace YOUREMAIL with your email address.
Commit your changes, zip up, and deploy the new version of your code. Once that's done, you should be able to go to https://YOURDOMAIN to access your website securely.
Step 3: (optional) Automatically renew your certificate
Let's Encrypt certificates are relatively short-lived - a mere 90 days. If you expect your site to be running in 90 days, you might want to set up an auto-renewal script that runs on the server to update the certificate once expiry gets close. Linux makes this easy with cron, a tool to run scheduled jobs on a schedule.
Just set up a new file in .ebextensions, perhaps 02_certbot_renewal.config:
# .ebextensions/02_certbot_renewal.config
files:
  "/etc/cron.d/certbot_renew":
    mode: "000644"
    owner: root
    group: root
    content: |
      # Run certbot renewal twice daily at random minutes (recommended by Let's Encrypt)
      23 2,14 * * * root /usr/bin/certbot renew --quiet --deploy-hook "systemctl reload nginx"

commands:
  01_remove_old_cron:
    command: "rm -f /etc/cron.d/certbot_renew.bak"
This will automatically run the certbot renewal command, and the command will automatically get a new certificate if you are within a month of expiring.
EZPZ