Creating an EC2 Instance in AWS Academy Learner Lab
Amazon Web Services (AWS) is one of the largest providers of cloud computing services in the world. They offer a huge array of services, from databases to VMs to speech recognition. While there are hundreds of cloud providers to choose from, it's a smart career move to get familiar with AWS because of their market share. In this lab you will use AWS Academy, Amazon's educational program, to get some free credit that you can use to create servers on Amazon's infrastructure.
Objectives
- Sign up for AWS Academy
- Become familiar with the AWS Academy Lab portal
- Create a virtual machine (EC2 instance) on AWS and connect to it from your computer
- Create a simple website on AWS that can be accessed from anywhere
Signing up for AWS Academy
The first step to getting set up is to sign up for AWS Academy. As a university student, you have access to (some) AWS resources for free, including a large set of courses that you can use to learn about what AWS can do. If you are enrolled in one of my classes, you should be able to access AWS Academy through a link that has been emailed to you.
- Check your email for a signup link from AWS Academy.
- You can then continue with the lab below.
The AWS Academy LMS
As I already explained, AWS Academy is Amazon's student developer partnership that gives you access to a whole bunch of free learning resources. We will use some of the free academy credits for activities in this course. After the course is over, you might have some credits left over that you can play with.
In the LMS modules page, you'll see a link to the student guide and another link to the Learner Lab. To enable AWS services, you'll go through the "Learner Lab" link. Once there, you'll be able to start the lab.
The "Lab" in the AWS Academy is a temporary environment for working with AWS services. To help students avoid situations where they turn on a big server, leave it running, and run out of credits in the first week of class, the AWS Lab turns off most services after 4 hours. In AWS, a "running" server is one that is currently turned on; a "stopped" server is one that is currently shut down; and a "terminated" server is deleted. So when your services stop after 4 hours, that doesn't mean your work is gone. It just means you have to come back and turn the lab on to get it running again.
Starting the Lab
The first thing you need to do is start your AWS Academy Lab environment. This is AWS's way of controlling your spending as you're learning how things work, while preventing you from using the lab environment to run enterprise websites. This environment runs for 4 hours, then automatically shuts down (but doesn't delete) all servers and services you are running.
To start the lab, you will go to the modules page of the Learner Lab course. Once there, you can click the Learner Lab link. You may have to turn off your adblocker to enable this page to function.
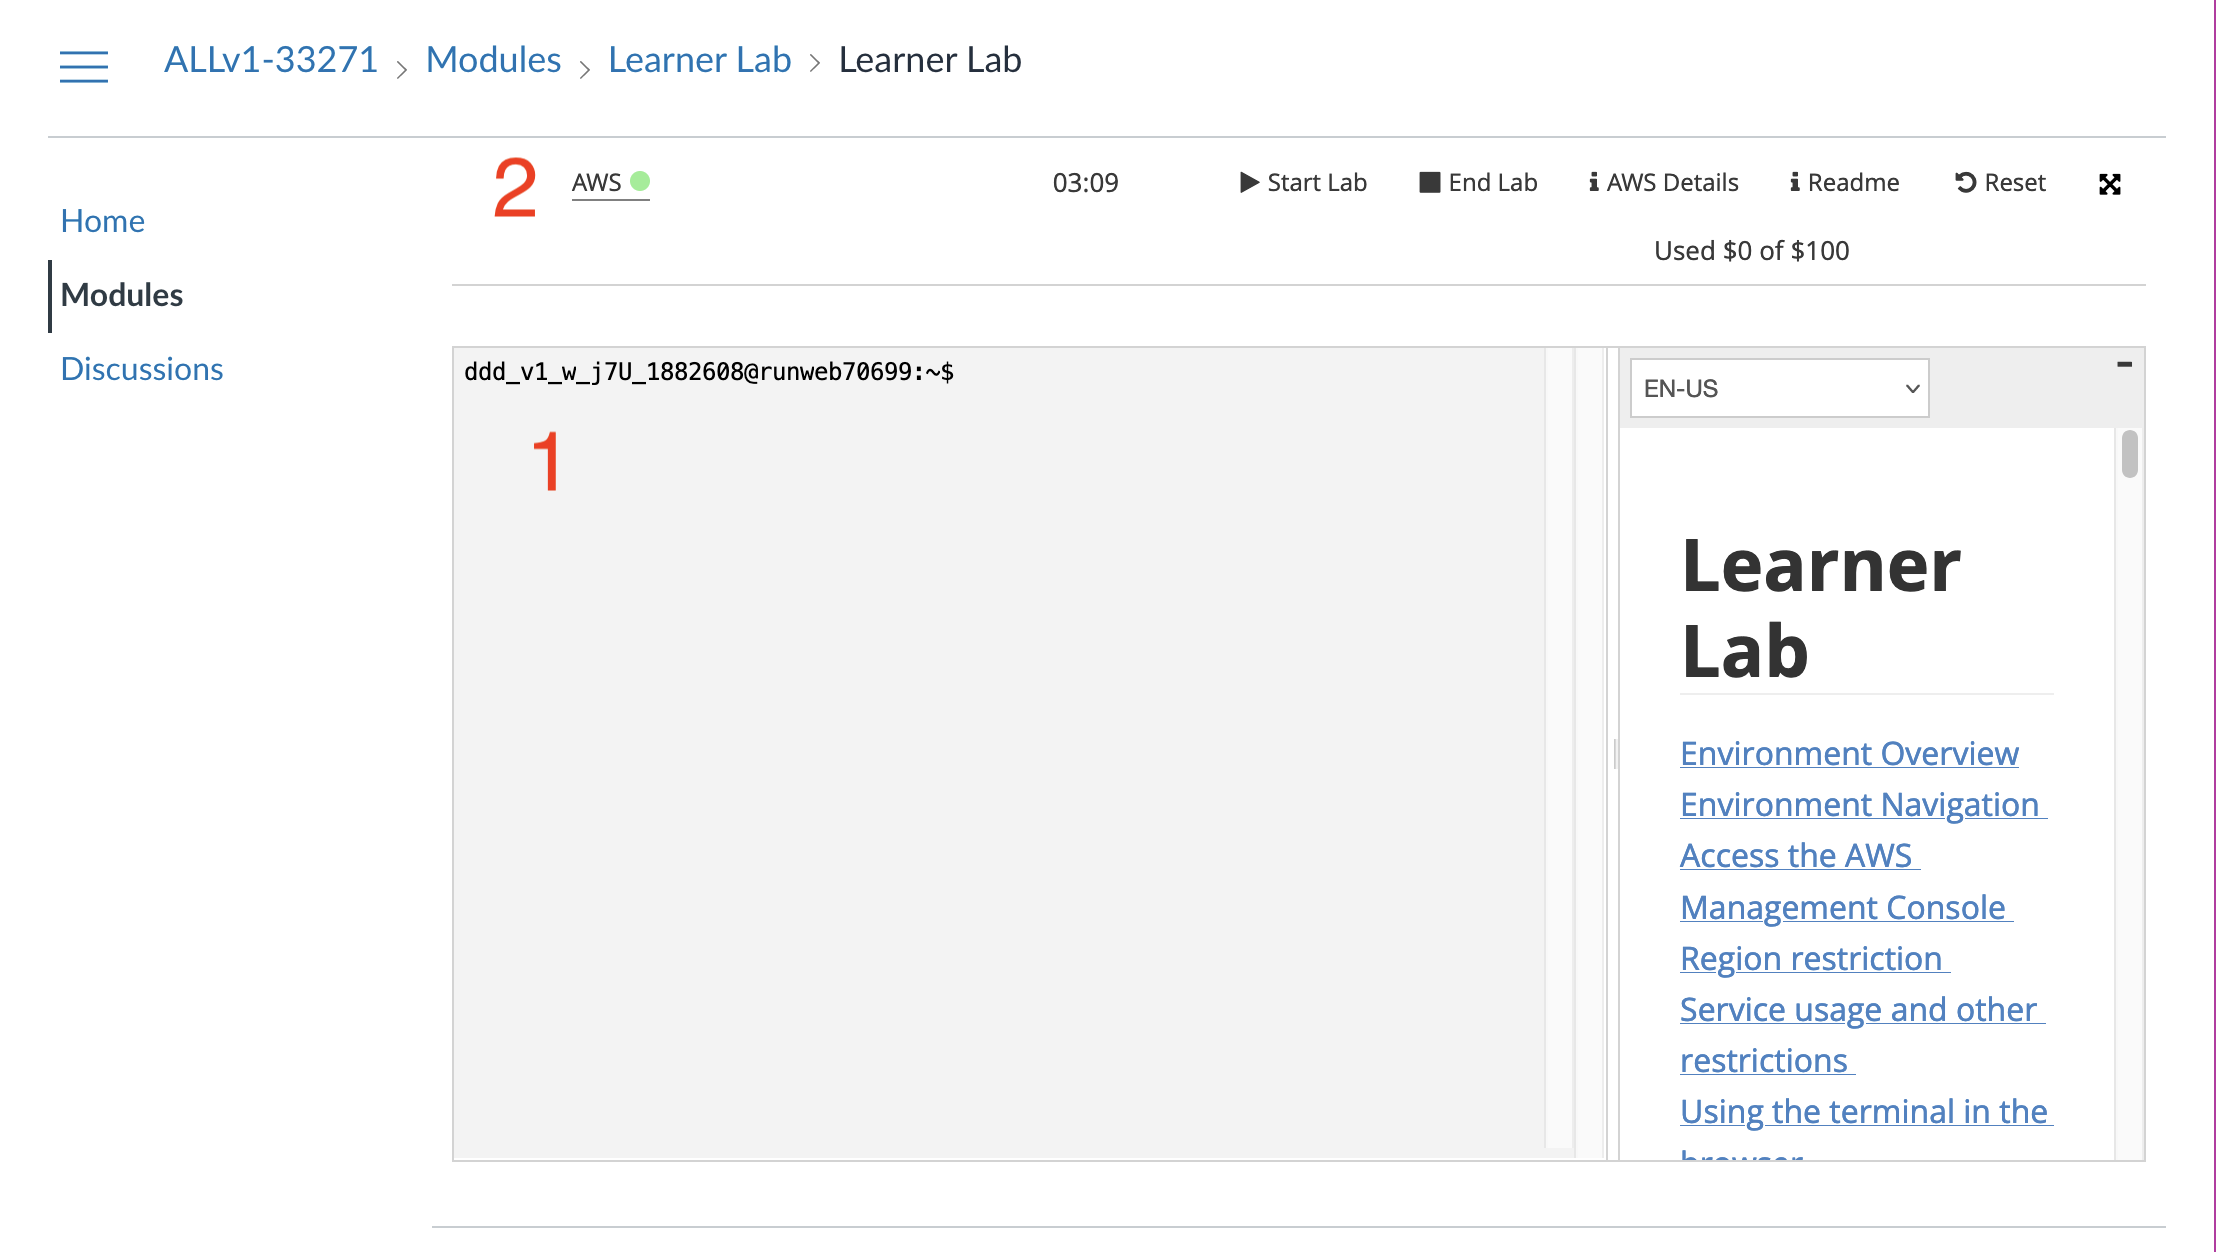
Then you can click the "Start Lab" button at the top of the page. The first time you run it, starting the lab will take 5-10 minutes, since AWS is creating a brand new environment for you to work in. In the future it will start up more quickly.
Once you have started the lab, you should see a screen like the one below. In the middle is a console that will let you interact with your lab environment directly with the AWS CLI (command line interface) — it’s labeled with a 1 in the screenshot below. Before we get into that, though, we’ll take a look at the AWS Management Console. Access the management console by clicking the AWS link (labeled with 2). You may need to allow popups on this page to let the management console window open.
Starting a Server
The simplest and most basic thing you will want to do to get started with AWS is to start up a virtual machine server. On AWS, these servers are called "EC2 Instances." Your EC2 server will be running in an Amazon data center somewhere in Virginia, and we will connect to it using the Secure Shell (SSH) protocol.
Create an instance
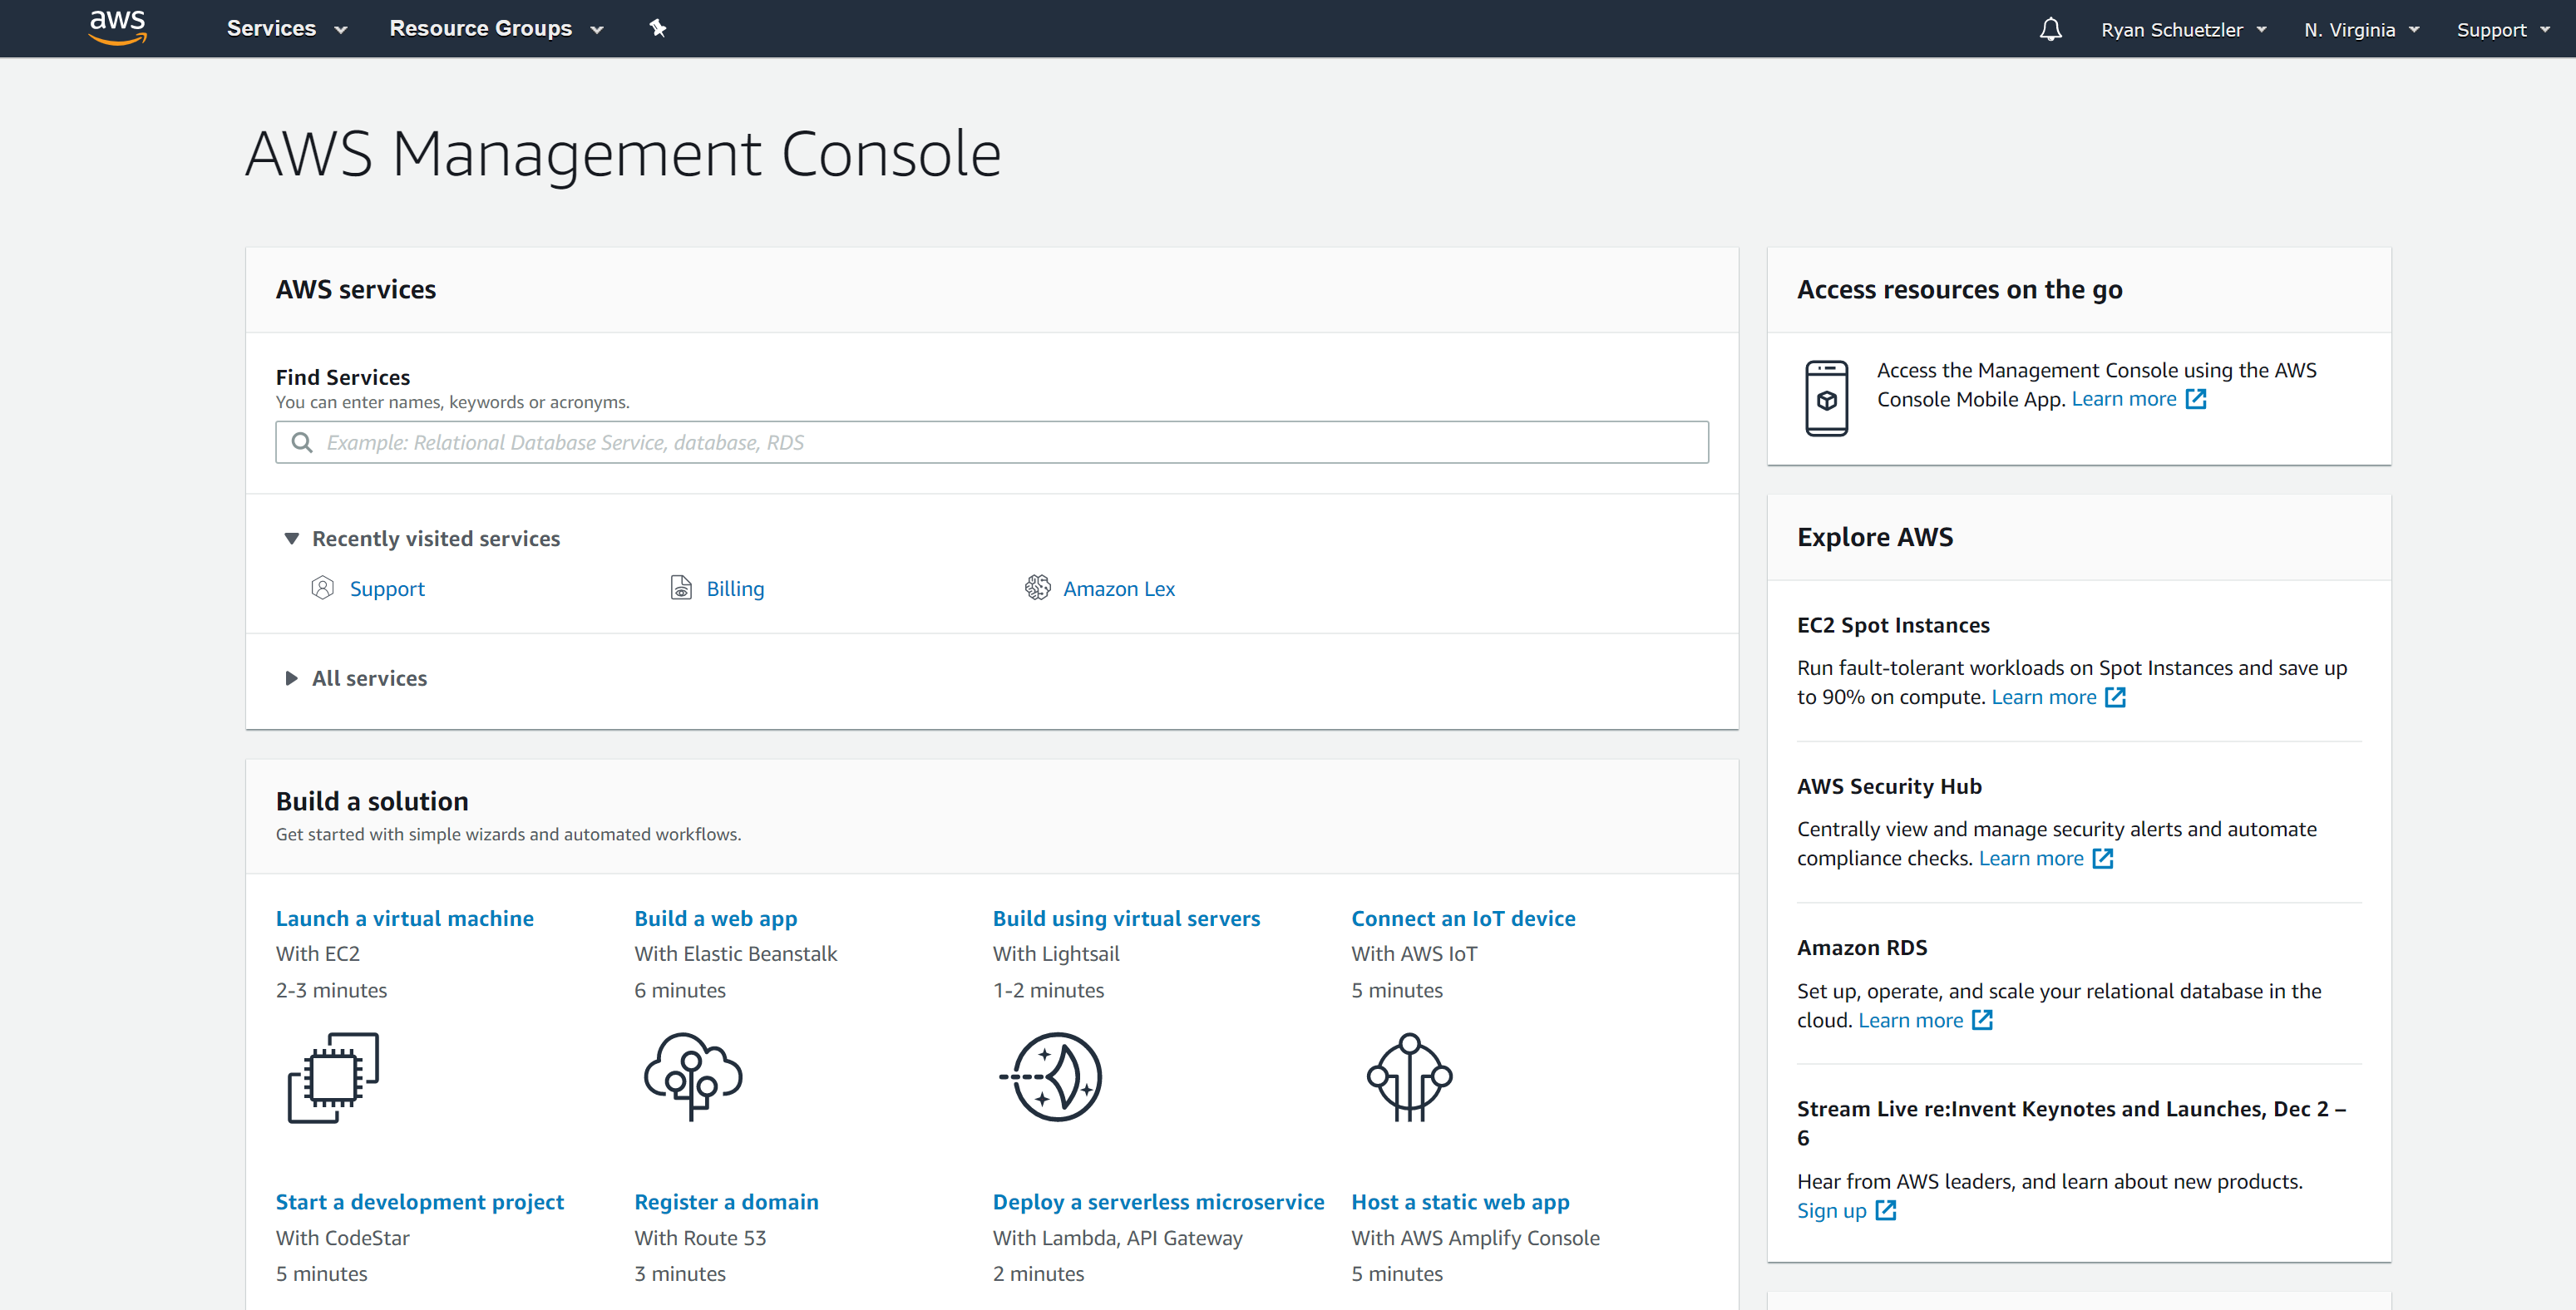
Go to the AWS Management Console and then launch a virtual machine with EC2.
- On the management console homepage, search for "EC2" to get to the EC2 dashboard
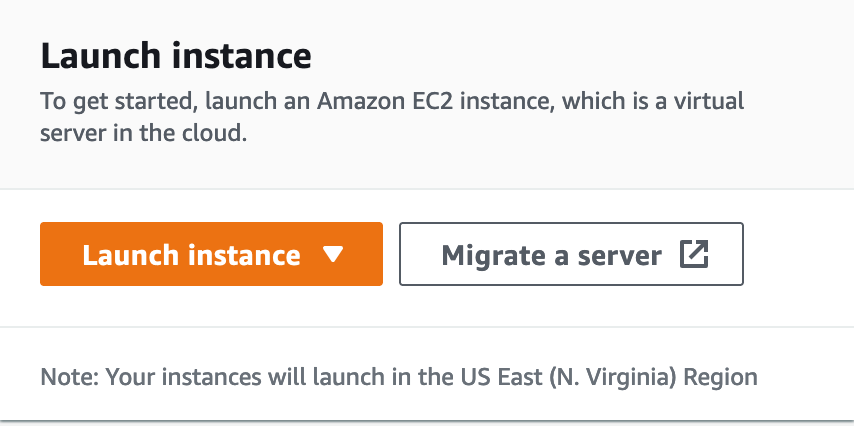
- Click the orange "Launch instance" button to get into the instance creation wizard
- Give the instance a name, such as "MyFirstInstance" (you can name it whatever you want.
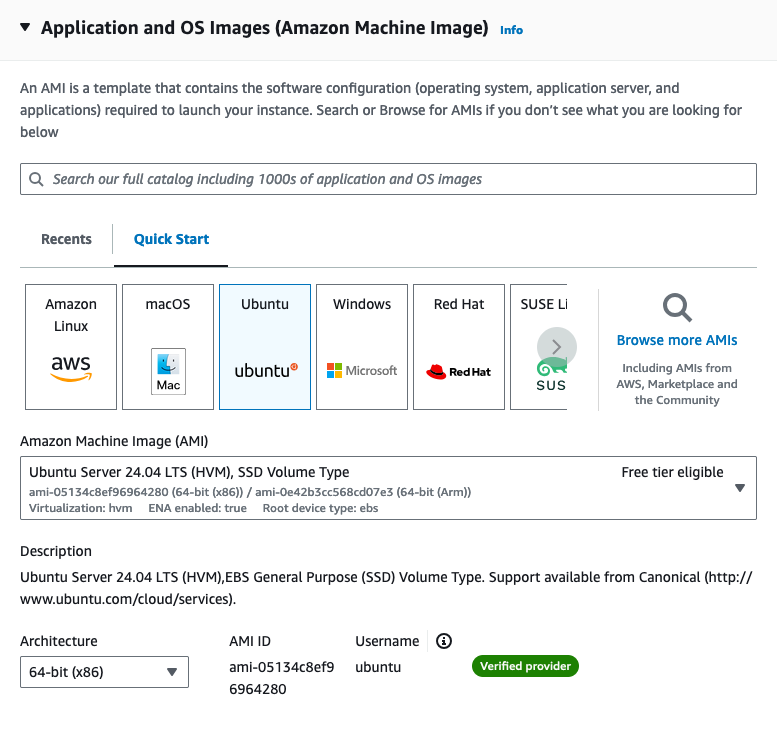
- Next you will choose the Amazon Machine Image (AMI). An AMI is a template that contains the software configuration (operating system, application server, and applications) required to launch your instance. Select Ubuntu from the quick start menu, then make sure "Ubuntu Server 24.04 LTS" is selected in the box below. Leave the 64-bit architecture as it is.
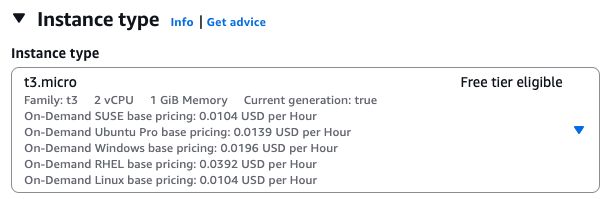
Choose an Instance Type which is free tier eligible (e.g., t3.micro, the default). Amazon EC2 provides a wide selection of instance types optimized to fit different use cases. Instances are virtual servers that can run applications.
- Under Key pair (login), select
vockey. This will be the way that you authenticate to log into the server. You can create a new keypair if you know what you’re doing, but usingvockeyis easy, and the key is already created for you.
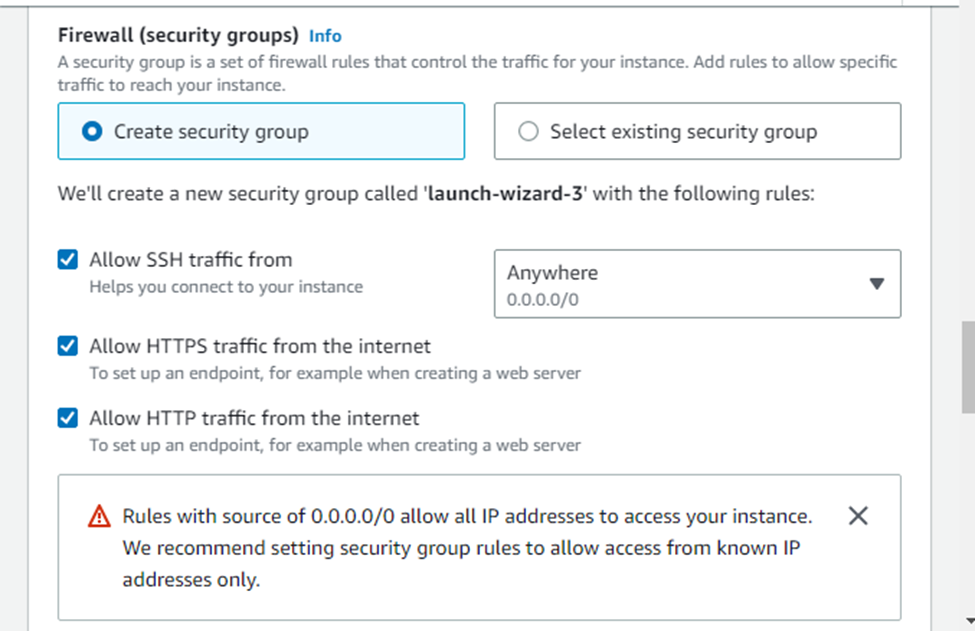
Under the network and firewall settings, create a new security group and check the boxes to allow SSH traffic from anywhere, and HTTP traffic from the internet. We won’t worry about HTTPS for this server just yet, but we’ll get there later. A security group is a set of rules that control the traffic for your instance. On this page, you can add rules to allow specific traffic to reach your instance. For example, if you want to set up a web server and allow Internet traffic to reach your instance, add rules that allow unrestricted access to the HTTP and HTTPS ports.
- Keep default options for storage
- Under Advanced details, under the option for IAM instance profile, select the option for
LabInstanceProfile. Leave the rest of the advanced options as they are.

- Click the button to launch your instance
- In the green bar that appears after you click the button, click on the instance ID. If you missed clicking on the instance ID there, you can always get to the instance list by clicking "Instances" in the left side menu in the EC2 section of the Management Console.

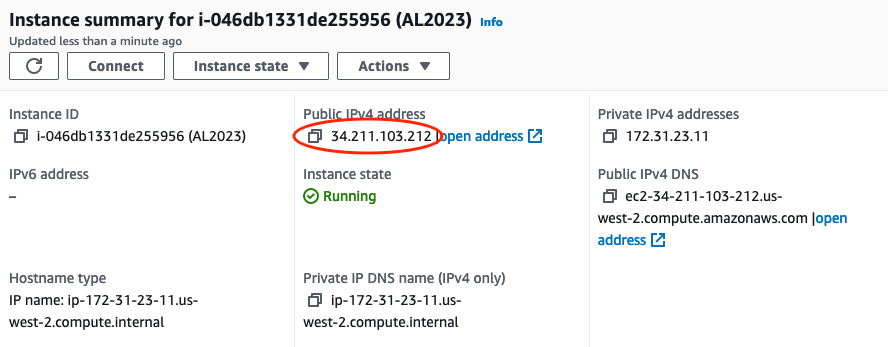
- In the next page that comes up, click on the instance ID again to pull up the instance summary page

- On the instance summary page, make note of your Public IPv4 Address (34.211.103.212 in the screenshot). You will use this address to access your server. Wherever you see an IP address in the example commands below, use your public IPv4 address.
Connect to your instance
Congratulations! You now have a server that is running in a datacenter somewhere in Virginia. That’s cool and all, but fairly useless unless you can connect with that instance and tell it to do something. So that’s what we’ll do next. There are several ways to connect to your remote server, but the most reliable is through SSH, so that’s what I’ll expect you to use throughout this semester.
What is SSH?
SSH stands for "Secure SHell." It’s a way for you to securely access and control another computer remotely, over the internet. Think of it like you are virtually connecting your keyboard and screen to another computer and use it as if you were sitting in front of it.
It’s often used by developers and system administrators to access servers and perform tasks remotely. For example, you might use SSH to log into a server in a data center and run commands to update software or check on the health of the server. Because SSH encrypts the connection, it’s much more secure than using something like Telnet, which sends your data in plain text.
SSH can use password authentication, but typically it uses keypair authentication. You already set up your EC2 instance to use a keypair that was created by the AWS academy lab. In these instructions, I’ll show you where to download the key, how to get it ready for use on your computer, and finally we’ll get you logged into the server.
SSH comes installed on all Windows and Mac computers by default, but the way to get it to work is slightly different, so I’ve got different sections here to walk you through that. (Click here for Windows instructions)
Logging in on a Mac
chmod command, setting the key so it can only be read by the file owner, and not by anybody else on the computer.- In the AWS Academy window (!NOT! the AWS Management Console - the Learner Lab window), click AWS Details.

- Next to SSH Key, choose "Download PEM".
- Open a terminal on your Mac. You can find it with Spotlight, in the Launchpad, or in the Applications/Utilities folder.
- Move the labsuser.pem file into your
~/.sshdirectory. If you get an error that says the directory does not exist, create it withmkdir.
mv ~/Downloads/labsuser.pem ~/.ssh/- Fix permissions on the labsuser.pem file. (See the callout at the beginning of this section for a note about why this is necessary)
chmod 400 ~/.ssh/labsuser.pem- Type the ssh command. Make sure you replace the IP address with the IP address of your server.
ssh -i ~/.ssh/labsuser.pem [email protected]- You will get a warning that
The authenticity of host '…' can’t be established. This warning just means you haven’t connected to this server before, and SSH doesn’t know if it’s the server you want to connect to. If you type "yes" and hit <Enter> you can accept the warning and connect to the server.
Success! Since you’re now logging in on your computer, you’ll have to once again accept the new identity of the server. You’ll see the same warning and have to accept it again every time the IP address of the server changes. Once you accept the warning, you should see that the prompt has changed to the [ubuntu@…] prompt you saw before. If it didn’t change, you might have to do some troubleshooting to figure out what went wrong. You should see something like the screenshot below
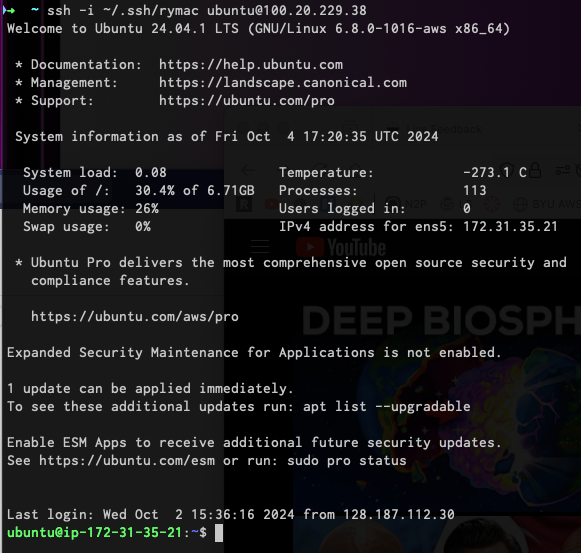
Once again, you’re now logged into the server. Play around, install something, edit a file, or whatever you want to. When you’re ready, you can move on to the next section to install Nginx on your server.
Logging in on Windows
On Windows, the story is a little different, but not that different. With any reasonably modern version of Windows, SSH is already installed, so we can use it almost the same way as on a Mac. I prefer to use the new Windows Terminal application from Microsoft (on the Windows Store), but the old command prompt works as well.
- In the AWS Academy window (!NOT! the AWS Management Console), click the "AWS Details" window.

- Next to SSH Key, choose "Download PEM".
- Open your Downloads folder, and move
labsuser.pemfrom there into your main user folder (C:\Users\yourusernamehere) - Open up your favorite Windows terminal application. It should start in your user folder
- Type the ssh command. Make sure you replace the IP address with the IP address of your server.
ssh -i labsuser.pem [email protected]- You will get a warning that
The authenticity of host '…' can’t be established. This warning just means you haven’t connected to this server before, and SSH doesn’t know if it’s the server you want to connect to. If you type "yes" and hit <Enter> you can accept the warning and connect to the server.
Success! Since you’re now logging in on your computer, you’ll have to once again accept the new identity of the server. You’ll see the same warning and have to accept it again every time the IP address of the server changes. Once you accept the warning, you should see that the prompt has changed to the [ubuntu@…] prompt you saw before. If it didn’t change, you might have to do some troubleshooting to figure out what went wrong. You should see something like the screenshot below

Once again, you’re now logged into the server. Play around, install something, edit a file, or whatever you want to. When you’re ready, you can move on to the next section.
Making a simple website (once you’ve logged in)
- Install Nginx web server through command.
sudo apt update
sudo apt install nginx- The files for the Nginx web server are in
/var/www/html. Edit those files to change what appears on the website.
Access your site
Once you’ve got all that done, it’s time to enjoy the fruits of your labors. Go back to your instance details (in the AWS Management Console) and find the Public IPv4 address section. Click on the button to "open address," then in the browser’s address bar, edit the https:// to be http:// (we’ll get security set up another time). Accept whatever warnings your browser puts up about accessing insecure websites, and you should see your website! If others around you are done with their sites, visit their pages by going to http://x.x.x.x (replacing x.x.x.x with whatever their public IPv4 address is)
Ideas for Exploration
The first thing I would do is set up an Elastic IP. Without it, you'll have to look up your instance's IP address every time the AWS Academy lab starts. Once you set up the Elastic IP, your instance will keep the same IP address the whole time.
There are so many services on AWS that you could play around with. With the starter account you won’t have access to everything, but you’ll be able to play around with a lot of the services that would be needed to create a website. Also, with the starter account you can use whatever services you want and when the credits run out, your services will shut down, so you won’t be charged.
Investigate some other services available on AWS, and learn what they do and how to use them. You can find the full list at https://aws.amazon.com/products/. To see which services you can use with your student account, scroll down on the right side of the Academy Lab page. The section titled "Service usage and other restrictions" describes what you can do, and what limits your account has. It can be overwhelming to see dozens or even hundreds of options, but with time and experience, it will become less confusing.
You can also play around by making your website more complex. Currently there is only one page (index.html). How would you create a second page and link to that? What about adding a stylesheet to make your page look pretty?